 Save
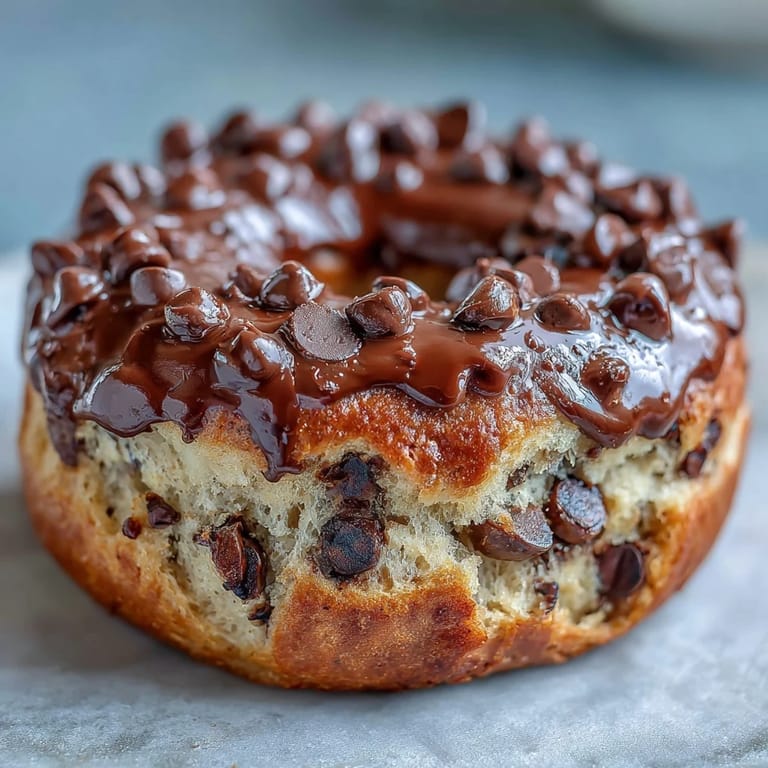
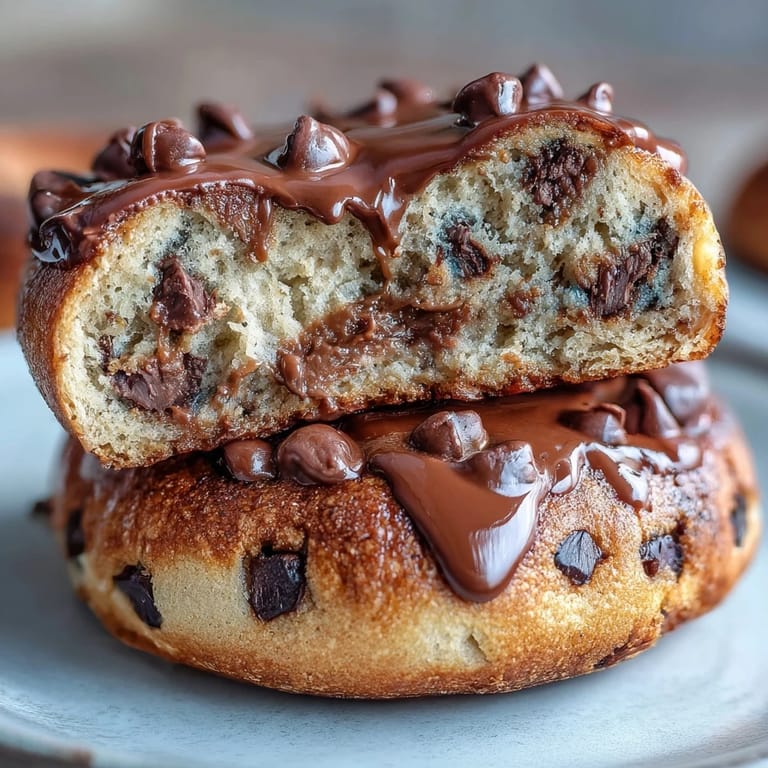
Save My mornings used to be a rushed scramble until I discovered these chocolate chip protein bagels in my kitchen one Tuesday. I had Greek yogurt nearing its expiration date, a scoop of vanilla protein powder taking up space in the pantry, and a wild idea that breakfast could be both indulgent and genuinely good for my body. The first batch came out of the oven golden and chewy, and suddenly I understood why people meal prep—not out of obligation, but because something this delicious deserved to happen more than once a week.
I made these for my roommate on a Saturday morning, and watching her face when she bit into one was honestly the best part of my week. She kept asking if I'd bought them from somewhere fancy, and when I said they were homemade with protein powder, she actually stopped mid-chew to look at me in disbelief. That's when I knew these bagels had crossed over from practical to genuinely impressive, the kind of breakfast that makes people feel cared for.
Ingredients
- White whole wheat flour (2 cups): This gives you heartier texture and actual nutritional value compared to all-purpose, plus it plays nice with protein powder without making things dense.
- Vanilla or unflavored protein powder (1 scoop): Choose whatever aligns with your diet, but vanilla adds subtle sweetness that plays well with chocolate without overpowering.
- Granulated sweetener (2 tbsp): Coconut sugar adds depth, erythritol keeps things light—pick what your body and taste buds prefer.
- Baking powder (1½ tsp): This is what gives bagels their characteristic chew without requiring yeast fermentation, which saves you actual hours.
- Salt (½ tsp): A pinch of salt makes the chocolate taste more like chocolate, trust me.
- Greek yogurt (1 cup): The magic ingredient that keeps these tender while delivering protein—use full-fat if you want extra richness, non-fat if you're watching calories.
- Vanilla extract (1 tsp): One teaspoon is all you need; more will taste like you're eating extract, which is genuinely unpleasant.
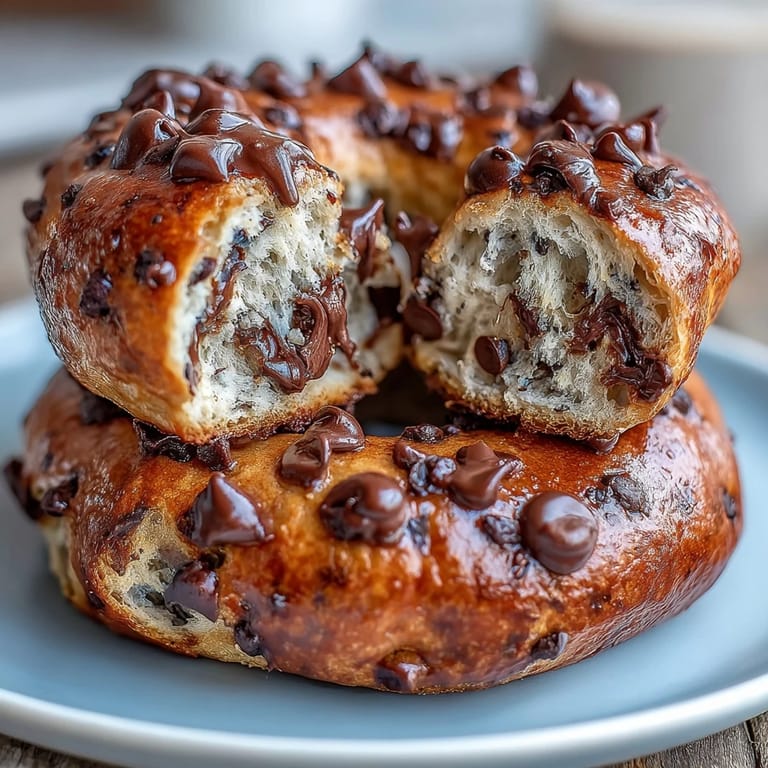
- Mini chocolate chips (½ cup): They distribute evenly and don't sink to the bottom like regular chips do, plus they melt into pockets of happiness throughout each bite.
- Water for boiling (6 cups): Boiling is what separates bagels from just bread rolls—it creates that characteristic chewy crust.
- Honey or maple syrup (1 tbsp): Optional but worth it; it gives the finished bagels a subtle shine and helps them brown more evenly in the oven.
- Egg wash (1 beaten egg): Also optional, but makes them look bakery-quality and golden instead of pale.
Tired of Takeout? 🥡
Get 10 meals you can make faster than delivery arrives. Seriously.
One email. No spam. Unsubscribe anytime.
Instructions
- Preheat and prepare:
- Get your oven to 375°F and line a baking sheet with parchment paper—this prevents sticking and cleanup becomes almost nonexistent. Have everything ready before you start mixing, because this dough moves fast once the yogurt hits the flour.
- Mix the dry foundation:
- Whisk together flour, protein powder, sweetener, baking powder, and salt in a large bowl until everything is evenly distributed. This prevents protein powder clumps from hiding in your finished bagels and throwing off texture.
- Bring wet and dry together:
- Add Greek yogurt and vanilla extract to the dry mixture and stir until a sticky dough forms—don't overthink this, just mix until there are no dry flour pockets. The dough should feel tacky but manageable, kind of like pizza dough's slightly less cooperative cousin.
- Fold in chocolate:
- Gently fold the mini chocolate chips into the dough with a spatula, turning the bowl as you go so they get distributed evenly. This takes maybe two minutes and beats hand-mixing because you won't develop too much gluten and end up with tough bagels.
- Knead to smoothness:
- Dust your work surface lightly with flour and knead the dough for 2–3 minutes until it stops being shaggy and comes together into a smooth ball. You'll feel the moment it clicks from sticky chaos to cooperative dough.
- Shape into bagels:
- Divide the dough into 6 equal portions and roll each into a ball, then poke a hole in the center with your thumb and gently stretch it into a bagel shape, about ¾-inch thick. The hole should be about the size of a quarter; it'll expand a bit during boiling, so don't make it too large.
- Boil for the bagel signature:
- Bring 6 cups of water to a gentle boil and add honey or maple syrup if you want that bakery shine. Boil bagels 2–3 at a time for 45 seconds per side—use a slotted spoon to flip them gently, and they should float at the top when they're done.
- Finish with color:
- Place boiled bagels on your prepared baking sheet and brush with beaten egg if you want that golden, shiny bakery look. This step is optional but honestly worth the extra 30 seconds.
- Bake until golden:
- Bake for 20–25 minutes until the tops are golden brown and the bagels sound slightly hollow when you tap them. This is when your kitchen smells incredible—like a bagel shop but better because you made it.
- Cool completely:
- Transfer bagels to a wire rack and let them cool completely before slicing or storing. They continue to set as they cool, and cutting into a warm bagel sometimes makes them a bit gummy inside.
 Save
Save These bagels have become my Sunday prep ritual, the moment I take back my mornings and decide what my week tastes like. There's something grounding about the smell of them boiling, about knowing that every breakfast this week is handled and actually something I want to eat, not something I'm forcing down before rushing out the door.
Storage and Meal Prep Magic
The best part about making a batch is that they stay fresh in an airtight container for up to four days, which means you can eat well without thinking about breakfast for almost a week. I slice mine in half, toast them while still slightly frozen, and top with almond butter or cream cheese depending on my mood—both directions work because these bagels are genuinely versatile.
Customization Ideas Worth Trying
Once you nail the basic recipe, it becomes a canvas for whatever sounds good that week. I've added cinnamon for cozy fall mornings, swapped chocolate chips for white chocolate and cranberry, and even made a savory version with everything bagel seasoning instead of sweetener. The dough is forgiving enough that you can play around without worrying about breaking something fundamental.
Why These Work for Real Life
These bagels bridge the gap between food that tastes indulgent and food that actually serves your body, which is the dream when you're trying to build sustainable breakfast habits. They freeze beautifully for up to two months, which means making two batches at once turns into a month of mornings already handled. On days when everything feels chaotic, having a homemade, protein-packed bagel waiting in the freezer is honestly like giving your future self a high-five.
- Toast them straight from frozen for a quick breakfast that tastes freshly made.
- Layer with Greek yogurt and berries for a breakfast that feels like you've figured something out.
- Keep a batch visible in your fridge so you actually eat them instead of reaching for less intentional options.
 Save
Save These bagels have genuinely changed how I think about breakfast, turning it from something I tolerate into something I actually look forward to. Make a batch this weekend and watch how the rest of your week settles into place.
Recipe FAQs
- → What type of flour is best for these bagels?
White whole wheat flour is recommended for a balanced texture and lightness, but you can experiment with other whole grain flours.
- → Can I substitute the protein powder?
Yes, vanilla or unflavored protein powders work well and won’t overpower the flavor of the chocolate chips.
- → Why are the bagels boiled before baking?
Boiling briefly sets the exterior, creating a chewy crust and soft interior, which is characteristic of traditional bagels.
- → Can I make these bagels vegan?
Use dairy-free yogurt and dairy-free chocolate chips, and omit the egg wash or replace it with plant-based alternatives for shine.
- → How should I store leftover bagels?
Store in an airtight container at room temperature for up to four days or freeze for up to two months to maintain freshness.