Save
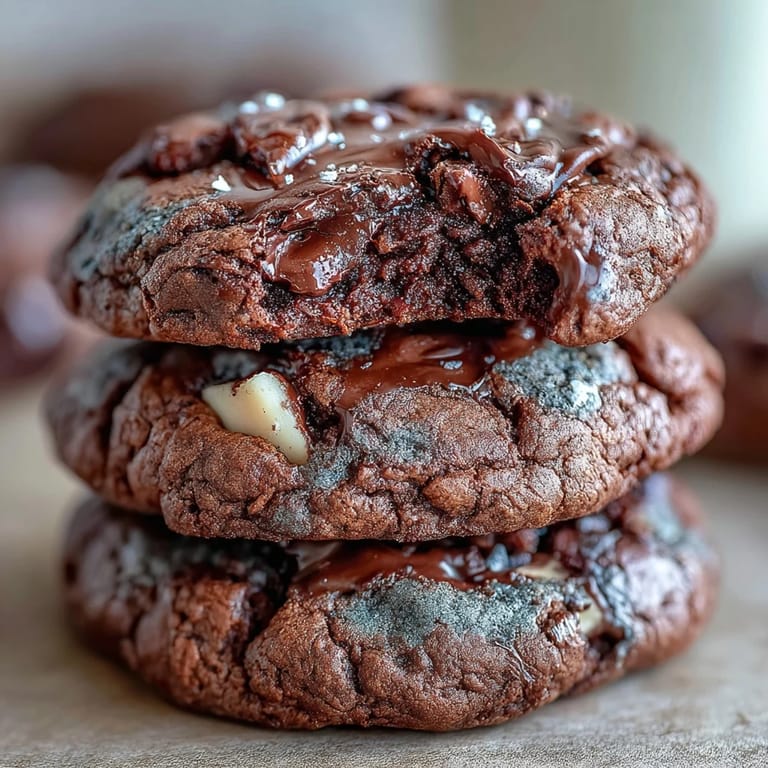
Save I discovered hojicha at a small tea shop tucked between two bookstores, and the roasted, almost coffee-like aroma stopped me in my tracks. The owner mentioned it worked beautifully in baking, which sparked this crazy idea to pair it with white chocolate and cocoa. My first batch came together almost by accident one rainy afternoon, and watching the edges set while the centers stayed slightly soft felt like uncovering a small secret. Now these cookies sit on my counter whenever I want something that tastes both familiar and unexpectedly sophisticated.
I made these for my neighbor who'd just mentioned being obsessed with matcha desserts, and watching her face light up when she realized it was hojicha instead felt like the best kind of surprise. She came back asking for the recipe before she'd finished the first cookie, which told me everything I needed to know about whether this was worth repeating.
Ingredients
- All-purpose flour (120 g): The backbone that gives structure without being heavy, letting the hojicha flavor shine through.
- Unsweetened cocoa powder (20 g): Adds depth and a subtle bitterness that grounds the sweetness and plays nicely with the tea.
- Hojicha powder (12 g): This roasted green tea is milder than matcha but carries this gorgeous nutty, almost caramel-like warmth that feels completely different from regular tea.
- Baking powder (1/2 tsp): Just enough lift to keep them tender rather than dense.
- Fine sea salt (1/2 tsp): A small amount that makes everything taste more like itself, especially important with delicate tea flavors.
- Unsalted butter, melted and slightly cooled (115 g): Melting it first creates a richer, more tender crumb than cold butter ever could.
- Light brown sugar (120 g): The molasses notes echo the roasted quality of hojicha beautifully.
- Granulated sugar (50 g): Balances the richness and helps create those slightly crispy edges we're after.
- Egg, room temperature (1 large): Brings everything together smoothly without seizing up the butter or chocolate.
- Vanilla extract (1 tsp): A quiet background note that doesn't compete with the hojicha.
- White chocolate, chopped or chips (100 g): The creamy surprise in every bite, though you can swap this for dark or milk chocolate if that's what calls to you.
Tired of Takeout? 🥡
Get 10 meals you can make faster than delivery arrives. Seriously.
One email. No spam. Unsubscribe anytime.
Instructions
- Set Your Stage:
- Preheat the oven to 175°C and line two baking sheets with parchment paper while you gather everything else. This five-minute head start makes the actual mixing feel effortless.
- Combine the Dry Goods:
- Whisk together the flour, cocoa powder, hojicha powder, baking powder, and salt in a medium bowl until the hojicha is evenly distributed and you don't see any dark streaks or clumps. This is your moment to make sure the tea flavor will be consistent throughout.
- Build the Wet Base:
- Pour the melted, slightly cooled butter into a large bowl and stir in both sugars until they're moistened and starting to look like damp sand. The butter should still be warm enough to feel comfortable touching, but not so hot that it scrambles anything.
- Bring in the Egg:
- Add the room-temperature egg and vanilla to the butter mixture and beat until the whole thing becomes pale, glossy, and noticeably lighter in color. This takes maybe a minute of stirring, and it's worth watching because you'll see the exact moment it transforms.
- Marry the Mixtures:
- Gradually stir the dry ingredients into the wet mixture, stopping as soon as you no longer see flour streaks. Overmixing is the one thing that can make these tough, so resist the urge to keep stirring once everything just comes together.
- Fold in the White Chocolate:
- Gently fold in the chopped white chocolate so the pieces stay mostly intact and distributed throughout. Some melting is fine and honestly adds to the texture.
- Portion with Care:
- Scoop tablespoons of dough onto your prepared sheets, leaving about 5 cm between each cookie because they'll spread slightly. I like using a small cookie scoop so they're roughly the same size and bake evenly.
- Watch Them Bake:
- Bake for 10 to 12 minutes, until the edges look set and firm but the centers still look slightly underbaked and soft. They'll continue cooking on the pan after you pull them out, so don't wait for them to look completely done.
- Cool with Patience:
- Let them sit on the pan for 5 minutes so they firm up enough to move without falling apart, then transfer them to a wire rack to cool completely. This resting period is when they develop that perfect chewy center texture.
 Save
Save There's something about the moment someone bites into one of these and their expression shifts from curiosity to genuine pleasure that reminds me why I love cooking for people. It's not complicated, but it feels thoughtful, and that's what makes it special.
Storage and Making Them Last
These cookies stay soft and chewy in an airtight container at room temperature for at least three days, which is longer than most cookies have any right to last. If you want them even further in the future, they freeze beautifully for up to two months, and you can eat them straight from the freezer or let them thaw for ten minutes.
Flavor Variations Worth Trying
Once you've made these once and fallen for them, you might start experimenting like I did. Dark chocolate chips create a more sophisticated bitterness that makes the hojicha taste earthier, while milk chocolate softens everything into something creamier and less assertive. The original white chocolate remains my favorite, but there's real joy in discovering what tastes right to your own palate.
Equipment Notes and Final Thoughts
You really only need basic tools for this recipe, which makes it perfect for a weeknight baking impulse or a last-minute gift. A cookie scoop keeps things consistent, parchment paper saves cleanup, and a wire rack lets air circulate so the bottoms don't get soggy.
- If you don't have hojicha powder, you can sometimes find it at Japanese markets, specialty tea shops, or online retailers.
- Make sure your chocolate is chopped relatively small so it distributes evenly through the dough.
- Room-temperature eggs really do blend more smoothly, so pull one out of the fridge a few minutes before you start mixing.
 Save
Save These hojicha brownie cookies have become one of those recipes I return to again and again, whether I'm stress-baking on a difficult day or bringing something to share with friends. They taste like a small moment of intentional joy.
Recipe FAQs
- → What does hojicha taste like?
Hojicha has a distinctive nutty, roasted flavor with earthy undertones. Unlike fresh green tea, it's less bitter and more comforting, making it perfect for baking.
- → Can I substitute the hojicha powder?
Matcha powder works but will give a brighter, grassier flavor. For a different profile, try instant coffee powder for a mocha variation.
- → Why should I slightly underbake these cookies?
Removing them when centers look slightly underbaked ensures that soft, chewy texture as they finish cooking on the hot pan during the 5-minute cooling period.
- → How should I store these cookies?
Keep in an airtight container at room temperature for up to 5 days. They also freeze beautifully for up to 2 months—thaw at room temperature before serving.
- → Can I make the dough ahead of time?
Yes! Scoop the dough onto a baking sheet and freeze raw. Once solid, transfer to a freezer bag. Bake from frozen, adding 1-2 extra minutes.